
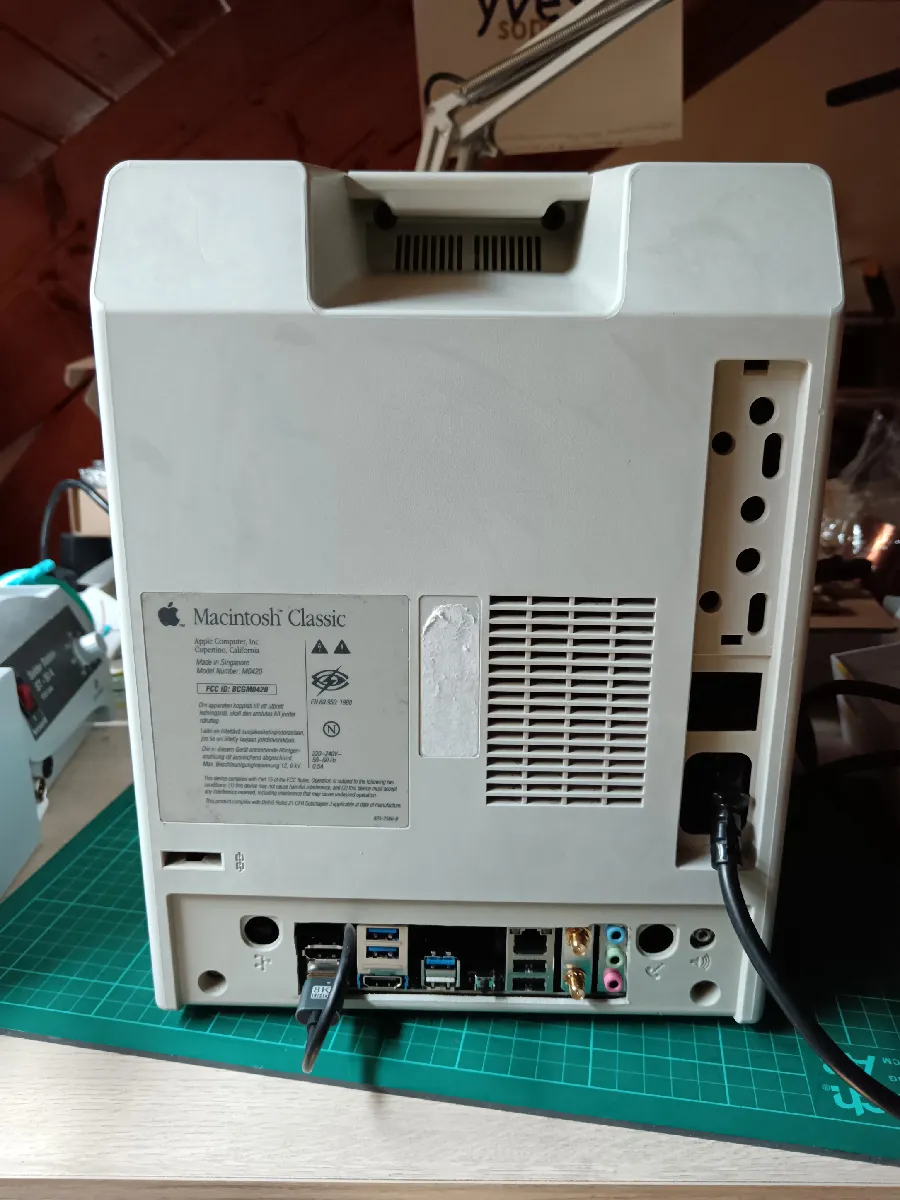
Macintosh Classic 💾
My retrofitting project - yduf / r/VintageApple / wikipedia
Classic


Repair & Restoration
- Macintosh Classic Restoration
- cleaning case - with hydrogen peroxyde bath + uv light
- plastic wrap created marks ?
- Macintosh SE Restoration
- Macintosh SE - recovery of a Macintosh SE motherboard severely damaged due to a battery leak. I didn’t think this could be possible and choose the destructive path below.
Note: this is the inside of a SE:

Macintosh Classic disassembly
- How (not) to discharge a CRT! ⚡
- Removing the motherboard - The motherboard has no screws, so it can be removed by pulling upwards.
- Make sure to disconnect all cables.
- Remove The Floppy Drive - 4 screws to remove - all hidden below, accessible only after removing the mother board, 2 behind the plastic fan
Cleaning case
- with 3% hydrogen peroxyde and plastic wrap + 4sun hours
- nouvelles techniques pour restaurer des plastiques jaunis ! - chauffée a 71°
- Retr0bright - de-yellowing do’s, dont’s, and playing devil’s advocate - test different light condition
- sun is more evenly distributed (5h/1 day).
- fluerescent light work well (24h).
Reusing CRT Video 🖵
- Generate a VGA signal for inboard CRT from a raspberry pi GPIO, see instructables
- full article here
- guide on RGBTOHDMI
- video board - exporting analog to hdmi
- Apple never built a Mac like this - unmounting & discharging the CRT.
see also
- 1993 Apple Macintosh Classic II Repair & Restoration - changing capacitor
- J’ai construit un Mac IMPOSSIBLE
- I Built a “Mac Minus” With a Real CRT
- old a B&W CRT from old small TV
Electronic
Floppy Drive
- Sony MP-F75W Teardown / youtube
- Floppy Emu - a floppy and hard disk emulator for classic Apple II, Macintosh, and Lisa computers. It uses an SD memory card and custom hardware to mimic an Apple floppy disk and drive, or an Apple hard drive. The Emu behaves exactly like a real disk drive, requiring no special software or drivers.
see also
- Floppy8 - A Tiny Computer, in a Floppy Drive
- Repairing and Restoring a Vintage Macintosh Floppy Drive
Project - rehousing
35 years (or so) latter
- Case
- - retrobright case - didn’t go as planned
- - remove rust by electrolysis on chassis corrosion (caused by component leak)
- Preps
- - screen is working
- - assemble motherboard
- - check motherboard
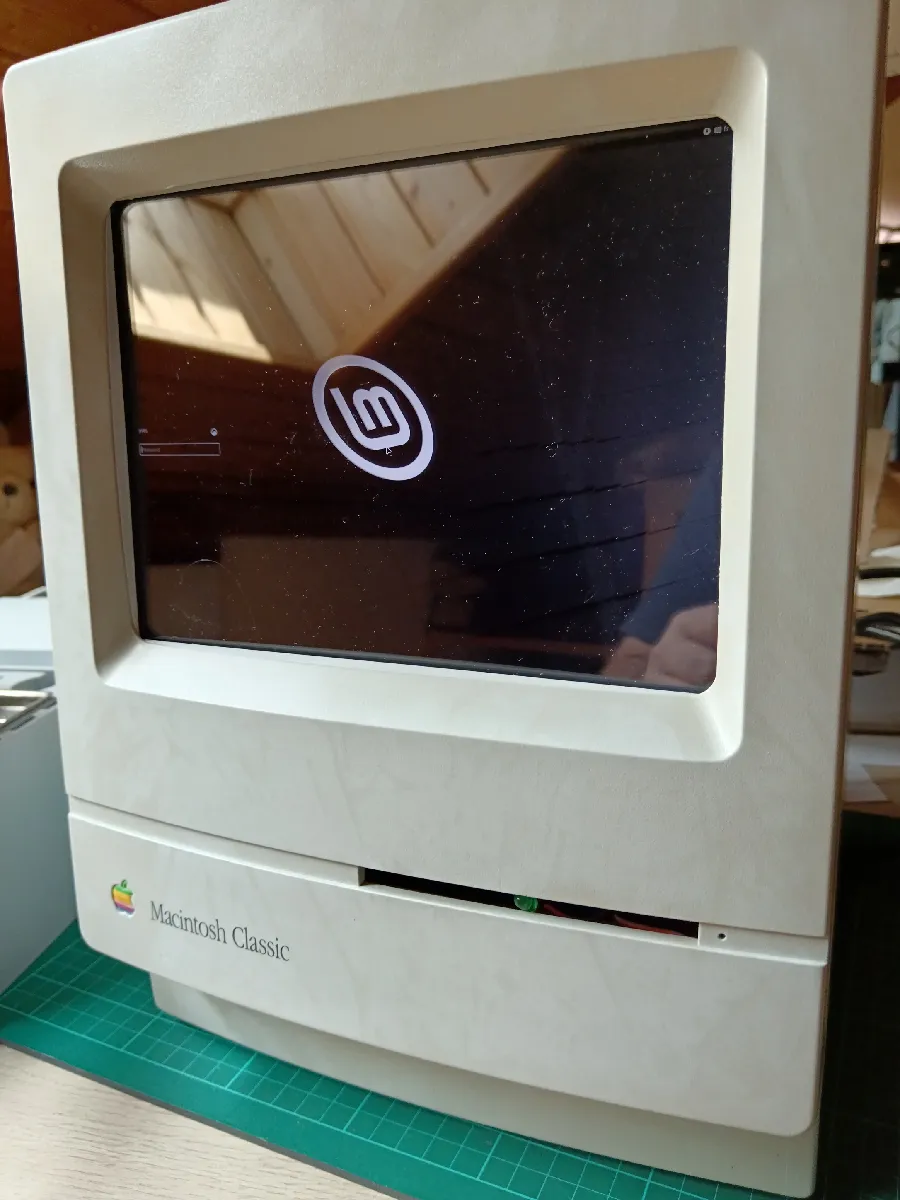
- - install OS - from reused from lab
- Screen fitting
- - redesigned bezel
- - paint bezel - using light grey
- - glue bezel with B7000 - 30min Liquid / 2h can be handled / 6h finished
- - cut 2mm acrylic glass to fill remaining gap / have a proper plane
glue acrylic screen - to reinforce bezel base.
- - fix screen on acrylic
- - attach main electronic - screwed on bottom bezel / taped on mid board
- - power screen using 12V Molex source
- - LCD screen control, accessible under the screen
- - redesigned bezel
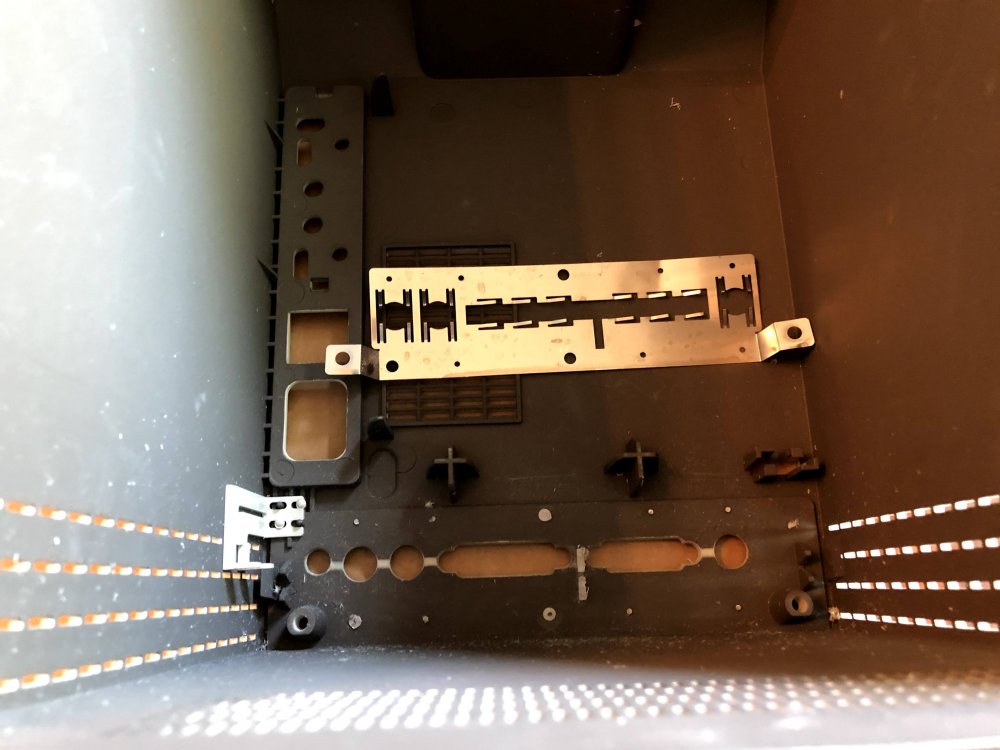
- Motherboard Fit
- - cut backplate - used this kind of tool
- - remove metal backplate - drill / cut / melt attach
- - cut chassis - [x] remove bur
- - design foot / hook mechanism
- - glue a corniere on each side for supporting motherboard
- - reset / power on button fit
- - reuse original one - the easiest path
- - cut backplate - used this kind of tool
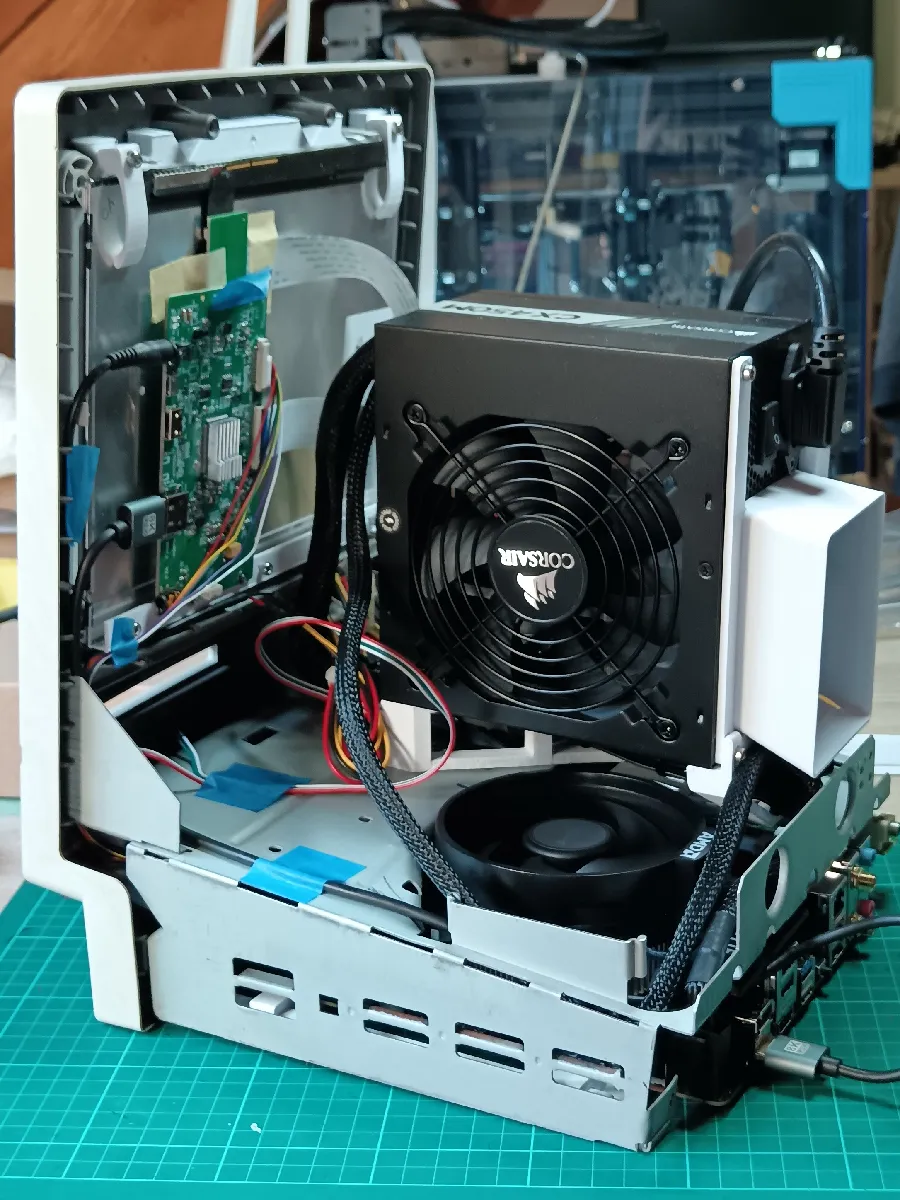
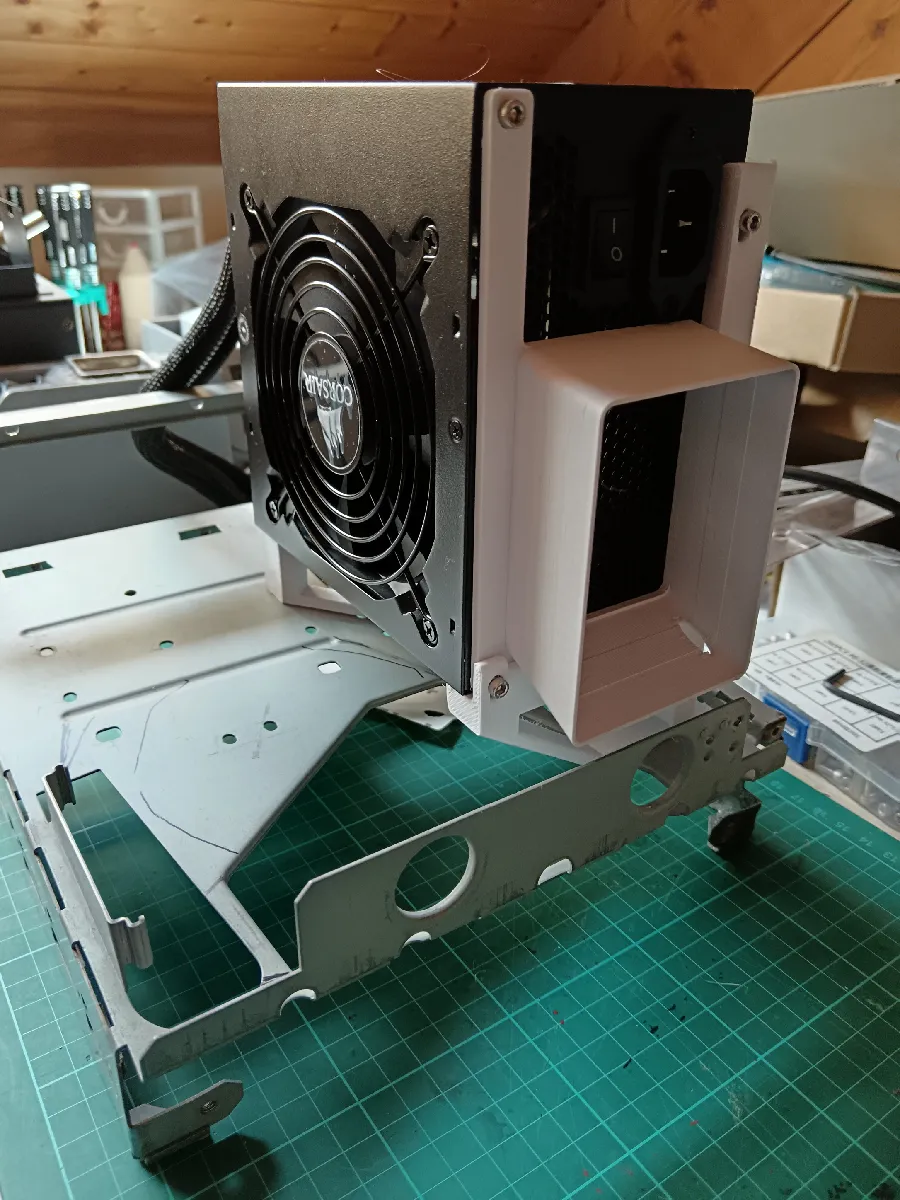
- ATX Power fit
- - design support & fan duct
- - fit cable
- - direct connection to internal ATX
- - unsolder power socket & switch from power board
- iron with 400-450°C + manual solder pump - need to go smoothly
- power socket is also soldered to main board
- - use original power switch
- Missing / to Finish
- - power socket fit & power switch
- - cut plate to secure socket bracket
- - serial number sticker to glue back (didn’t like the retrobright cleaning process).
- Optional
- - fit HP
- - hdd led - braket to hold led that could be usefull
- - design a prettier backpanel cover
- Closing
- archive motherboard doc
- adds my own pics to project
Fiting a Full PC
- Mac Classic Retrofit - Breathe new life into a classic!
- cutting back panel
- or build a backpanel to avoid it
- Vintage Mac Classic NAS - lot of pics
- Not Bad: Remodelling the Mac Classic II into a PC
- I Built a Gaming PC Inside a Retro Mac - The Joshintosh / 2 - use the motherboard as support for fan intake
- Mac Classic HS - 50€ (leboncoin)
- clavier sans fil
- retro mouse - 3D Printed - Apple Macintosh Mouse
- picotron onboard
- requiert un amd64.
see also
- retrofitted Macintosh Classic - has link to rebuild a mac mouse
- Macintosh Classic II Color Hackintosh
- New life on a 30-year-old Macintosh Classic II - glue screen + mac mini. - screen bigger than aperture.
- Macintosh Plus mini Retrofit - Build Video!
- use an acrylic fake CRT screen for filling the gap
New Hardware
Hardware Total: 535€
- motherboard/Cpu/ram: 388€
- ryzen 7 5700G 165€ - garantie 3Y
- 8 Coeurs/16 Threads, 65W TDP
- PCIe 3.0 - does not support PCIe 4.0 / Impact on Graphics Cards may stay minimal.
- 64Go 107€
- miniITX 116€ - Gigabyte A520I AC ITX / spec / manual
- 3x Hybrid Fan Pin Headers - PWM or Voltage mode.
- only PCIe 3.0
- ryzen 7 5700G 165€ - garantie 3Y
- better ventirad: 40€ - not yet
- Thermalright AXP90-X47 Full copper - comparison - best is a liquid cooler 67° - the second best is this one with 76°
- mac screen replacement 79€ - VSDISPLAY Écran LCD 9,7 - spec écran IPS eDP 440nit ref VS-RTD09703-V1
- Note I found latter a much cheaper screen that seems to be equivalent - aliexpress / from thingiverse fitting controls in floppy drive - around 56 € (boards+screen) / screen alone (36€)
- power: 68€ - Corsair CX450M - semi cablé
| Minit ITX | motherboard | price | constraint | cpu | gpu | ram | ventirad | Total | |
|---|---|---|---|---|---|---|---|---|---|
|
carte N305 / ou switch avec le NAS ? |
260 |
max 16Go |
i3 octocore |
16Go DDR5 |
not |
327 | |||
|
AM4 |
118 |
ryzen 5000 doc |
radeon |
64Go DDR4 |
inclus |
469 |
292 | ||
|
165 |
402 |
Screen 🖵
- my own 3dprinted Bezel - good fit / not easy to glue
- acrylic filler, fill the remaining gap between the original display screws. Protect display.
- colle B7000 - decollage en chauffant a 80°C
- LCD screen control - under the screen
My Choice Ecran IPS 4/3
- VSDISPLAY Écran LCD 9,7 - spec écran IPS eDP 440nit ref VS-RTD09703-V1
- the light is not homogenous (top is dimmer than bottom)
- Sufficient brightness is only possible when powered in 12V.
- the power connector is advised as 3.5Mm X 1.35Mm but doesn’t fit such cable (inside too thin for contact). Resolved with soldering on the cable plug to shorten the end and make contact.
see also
Display Notes 🚧
As the screen is too large, a solution need to be found for reducing the part shown on the screen. For linux there are some options to put shader on desktop, see ChatGPT:
- Picom - There also a possibility to simulate CRT.
- see also xrandr
- Wayland?
- Changing the resolution video to 1920x1080 make the full desktop visible on this screen (fit perfectly but losing 4:3 aspect).
- the OSD menu, has greyed option for repositioning or scale image => didn’t find anyway to enable them at all.

Options are:
- Mac Classic with LCD inside the CRT part 1 / part3- glass cut / smaller lcd 8in screen fit.
- cutting the tube - just don’t breathe the phosphors.
- fitting a pi / using it - simple black fillout
- Macintosh Plus mini Retrofit - acrylic sheet + custom bezel
ATX power fitting
- use ATX fan as exhaust fan
- put ATX on left side in front and close to back window
- use a fanduct
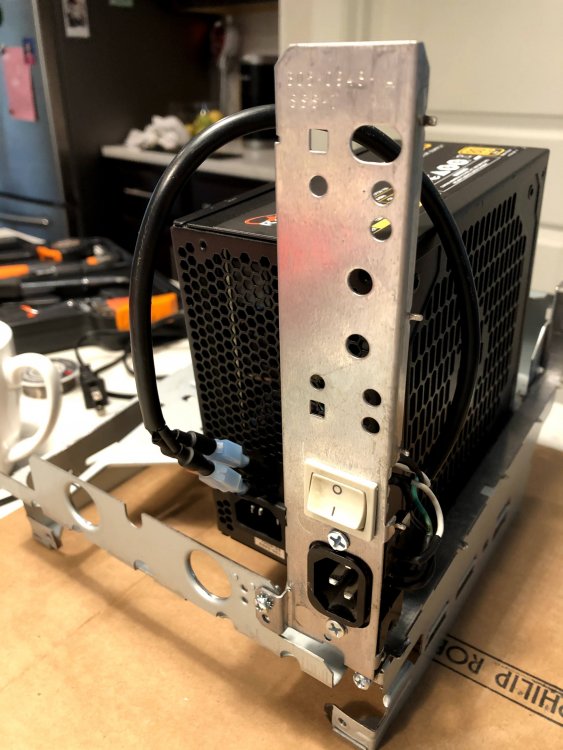
- reuse legacy socket
- deport/reduce ATX input socket / as its a C14 standard using this kind of Rallonge IEC320 C14 à C13, C14 avec trous de vis et coudé C13 de 30 cm dedicated to this kind of operation. - 3G 0.75mm² -> 10A (2300W)/ 16A (3680W) Max

- need to ground back plate ? previous connector was grouding the metallic parts.
- this can be done by grouding one of the ATX screw
Motherboard Fit
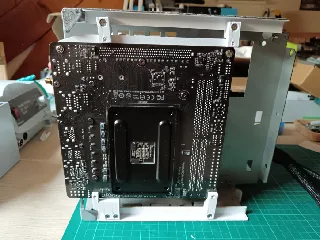
- 3dprint somelegs to support the mother board
- cut the back of the frame
- reuse power/reset button on the side
Notes
- current cooling system is not performant enough
- cpu/gpu raise to 95°C
- bottom frame is very/too hot.
Purpose ?
- Can host a local LLM
could be a 2.5Gb switch- could host nginx
- could be tied to the second available monitor
- could be used to offload computation / memory hog
- Xpra - to remote connect to application
- Share home - for seamless data access and navigation
3d Printed Alternatives
Tiny Mac III (Pi 4) - instructable / HN
- 3D Printed Full-Size Macintosh - The Brewintosh / arstechnica - full reconstruction of a Macintosh from scratch.
- Making a Tiny Mac From a Raspberry Pi Zero
- Making a Small Mac From a Raspberry Pi 3 - uses a 3.5 inch display
- 3dprinted full size
Free models
- macintosh classic housing (life size)
- thingiverse
- Macintosh Classic Mini
- Polymaker Muted White Filament
- Platinum PLA Filament (hex code: #BFBCB1) for newer Macs
- Macintosh Classic Mini
- Polymaker Muted White Filament
see also
- Macintosh Classic
- The Macintosh Garden
- Infinite Mac - a collection of classic Macintosh and NeXT system releases and software, all easily accessible from the comfort of a web browser.
- Trying To Find Meaning In Owning An Old Mac / HN
- Build log: Macintosh Classic
- PicoMac : le premier Macintosh, 40 ans plus tard
- I turned a CLOCK into a vintage Mac! / 2
Written on June 14, 2023, Last update on March 25, 2026
3dmodel
retro
project
macintosh
CRT
pc-hardware
chemical
yduf